
How to use the default GnuPG keyring with Thunderbird 78 under Linux. No master password setup required and no unencrypted private keys on disc!
- Thunderbird 78 GnuPG Migration
- Enable external GnuPG keyring
- Find and export your GPG key
- Adding you public GPG key to the Thunderbird OpenPGP Key Manager
- Configure email account to use an external GnuPG key
- Enabling encryption for additional email identities
- Testing GnuPG E-Mail Encryption
- Continue Reading
Thunderbird 78 GnuPG Migration
Thunderbird 78 switched from Enigmail to its builtin RNP encryption library. You’d need to import your existing GPG key from the GnuPG keyring into your Thunderbird profile. It came with two strong drawbacks:
- Your imported private GPG key will be stored unencrypted on disk
- As a workaround/alternative you must set a master password
- It will not operate with the system GPG keyring
If you’ve set a strong(!) master password for Thunderbird you are mostly covered. But I personally do not want to household my secret GPG key in two separate locations and I do not want to use a master password at all. So here is my solution:
We will use the GnuPG keyring for email decryption and the builtin RNP library for encryption. In order to make this work we need to enable the external GnuPG keyring support (for decrypting), manually add your public key to your Thunderbird OpenPGP Key Manager and finally register that private key for every email account/identity.
Enable external GnuPG keyring
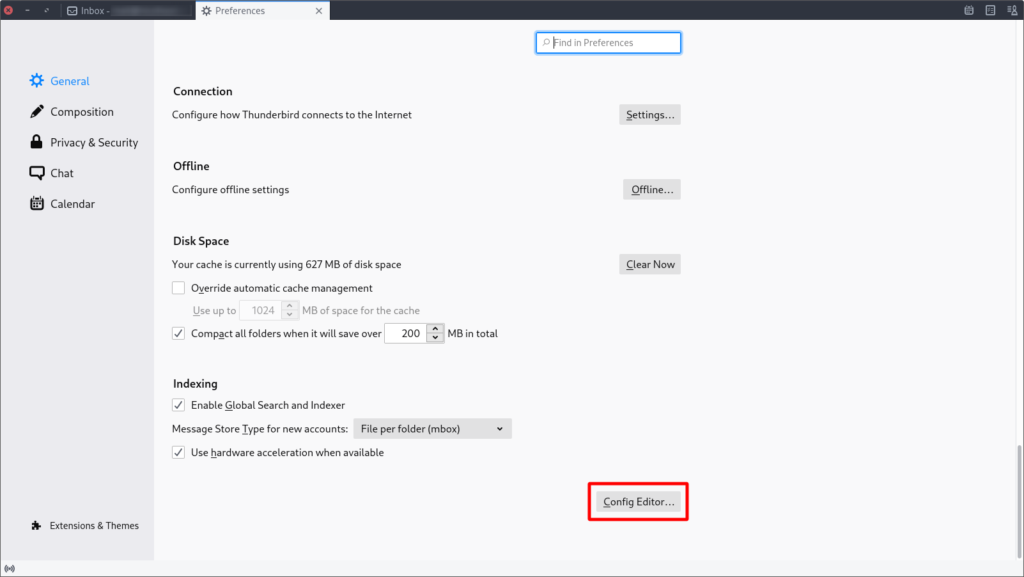
Go to the Thunderbird preferences/settings. In the general section you will find the config editor at the very bottom of the page:
You need to confirm the warning dialog and search for the mail.openpgp.allow_external_gnupg key. Double click it in order to set it to true:
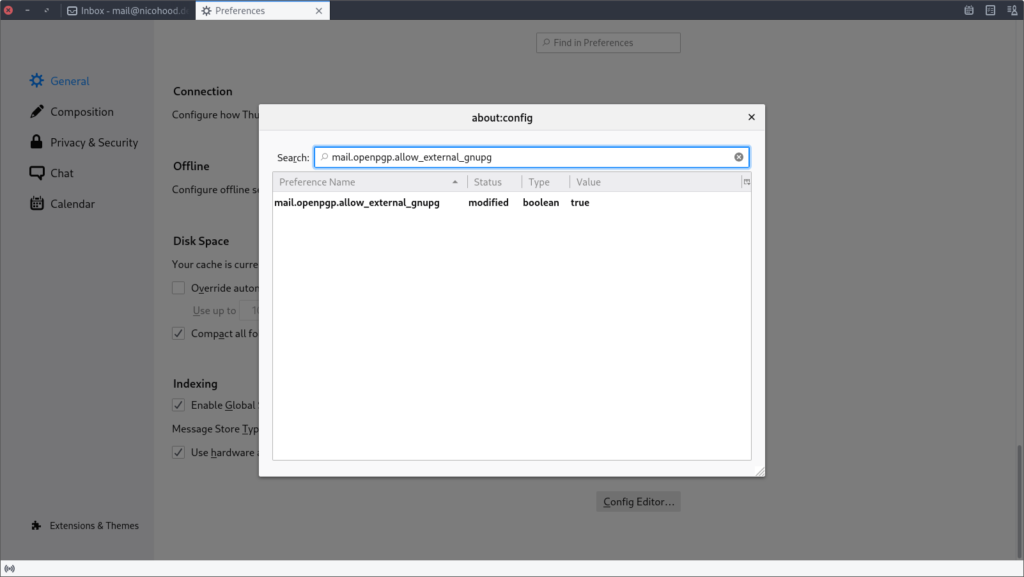
Thunderbird will now pick up you system GnuPG keyring for email encryption. Next we need to add your public GPG key to Thunderbird.
Find and export your GPG key
First you need to find out the GPG key ID of your private GPG key. You will possibly have that noted down somewhere on your website, or you can look it up using the GnuPG keyring:
$ gpg2 --list-secret-keys --keyid-format LONG
/home/user/.gnupg/pubring.kbx
sec rsa4096/51DAE9B7C1AE9161 2015-06-17 [SCA] [expires: 2023-04-21]
97312D5EB9D7AE7D0BD4307351DAE9B7C1AE9161
uid [ultimate] NicoHood
ssb rsa4096/E441069FE948D07A 2015-06-17 [E] [expires: 2023-04-21]Code language: Bash (bash)Next you should note down your GPG key id (in my case 97312D5EB9D7AE7D0BD4307351DAE9B7C1AE9161) and export your public GPG key:
gpg2 --armor --export 97312D5EB9D7AE7D0BD4307351DAE9B7C1AE9161 > publickey.ascCode language: Bash (bash)Adding you public GPG key to the Thunderbird OpenPGP Key Manager
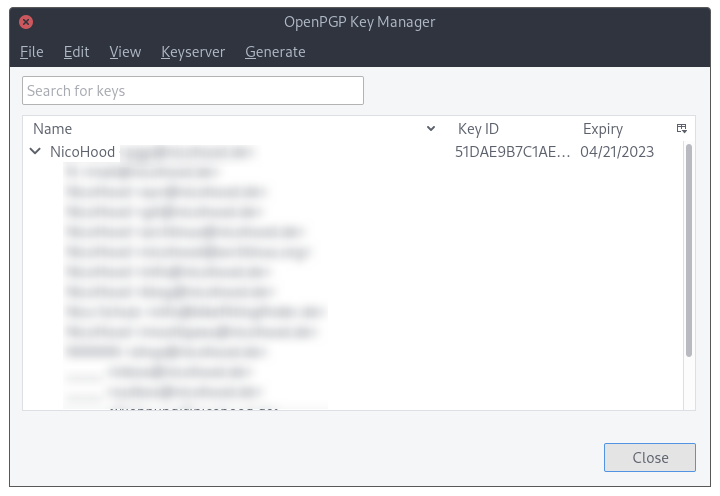
Open the Thunderbird menu (or press the ALT key on your keyboard) and go to Tools->OpenPGP Key Manager. Click on File->Import Public Key(s) from file and select the previously exported GPG key. Of course you can also import the keys from the clipboard via Edit->Import Key(s) from clipboard.
Configure email account to use an external GnuPG key
Next we need to tell Thunderbird to use your key for a specific account. To do so right click the account name on the left side account list and open the account Settings.
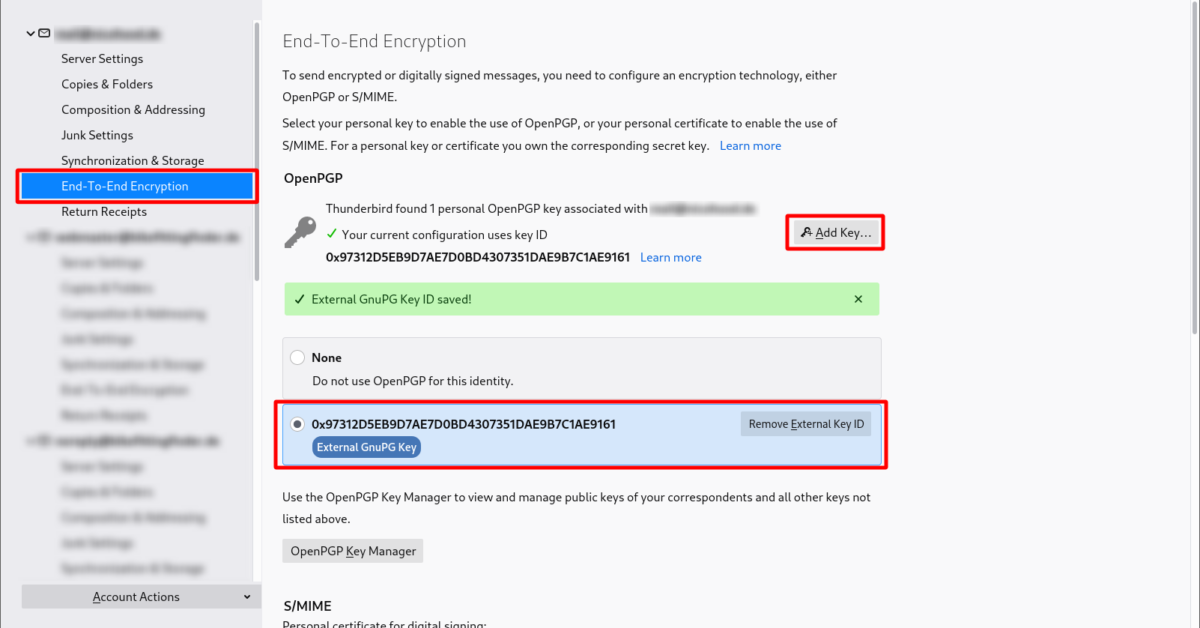
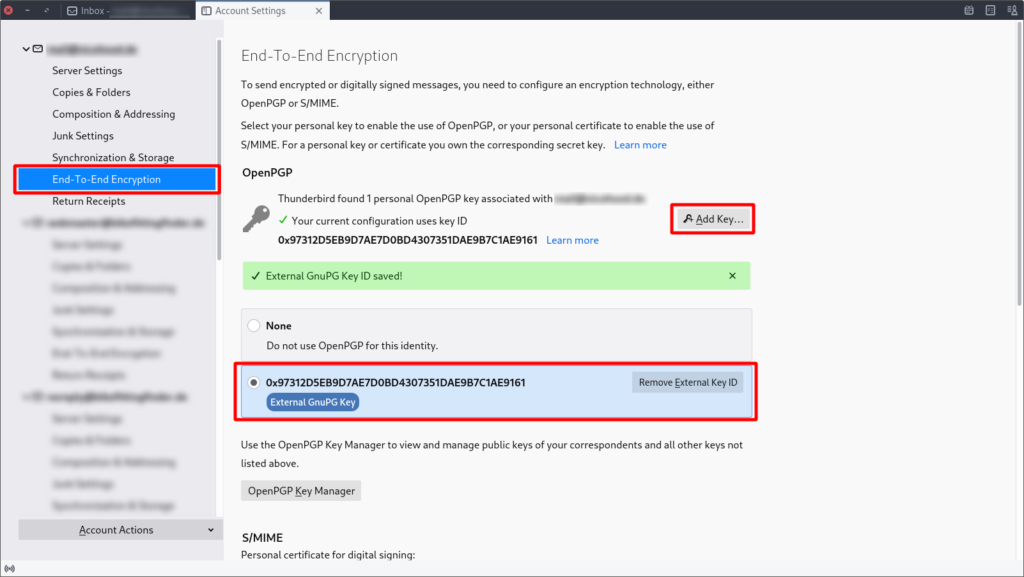
Go the the End-To-End Encryption section on the left side for that account and under the section OpenPGP click the Add Key… button. Make sure to enter the key without any spaces, otherwise it won’t work! Once everything is completed it will look like this:
Enabling encryption for additional email identities
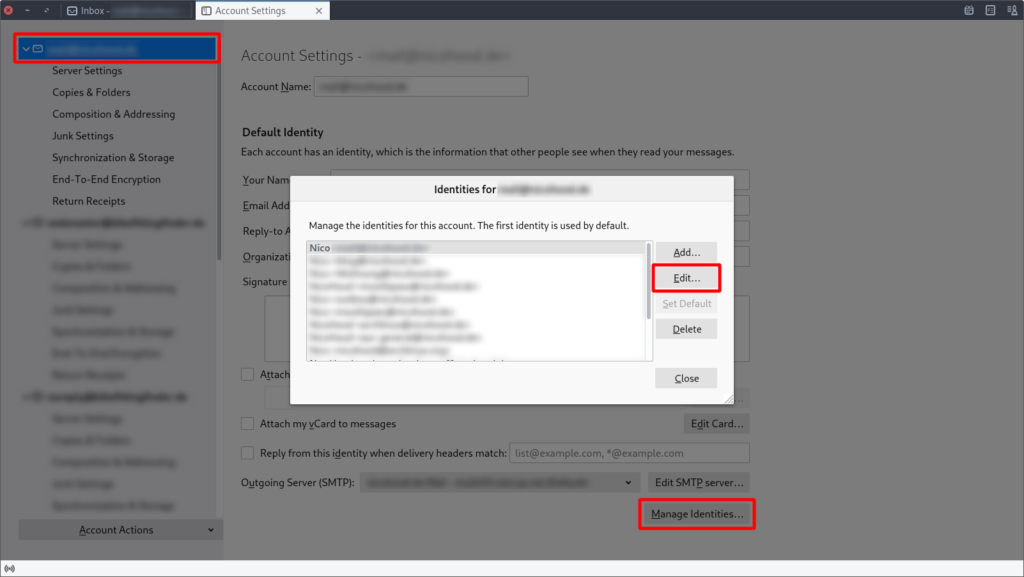
This step is only required if you have additional identities for your account. For example you are sending with multiple emails like info@xyz or blog@xyz. If you do have those identities and also want to enable GPG encryption for them you can go to the Account Settings->You Email->Manage Identities…->Edit.
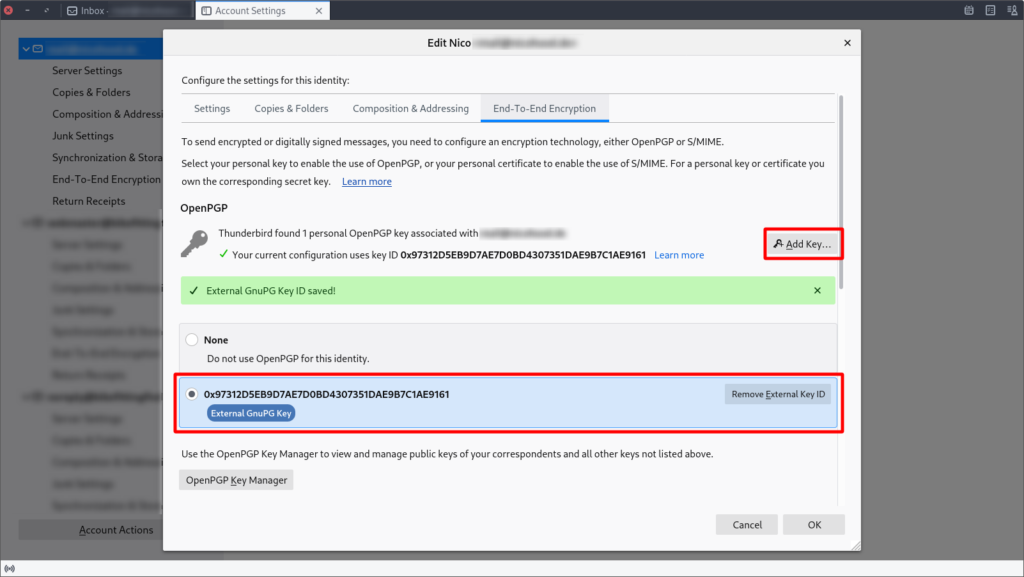
Now you can go to the End-To-End Encryption Tab and set your key similar as before.
Testing GnuPG E-Mail Encryption
Next you need to restart Thunderbird, otherwise it will not pick up the newly added identity settings. At least that is what I experienced.
Compose a new email and enable encryption via Security->Require Encryption. You should check Digitally Sign The Message and Attach My Public Key as well. The default GPG agent should prompt you for your private key passphrase within the default GnuPG keyring.
Continue Reading
- Sequoia PGP – A GnuPG keyring compatible drop in replacement of the Thunderbird RNP library
- Thunderbird Bugreport for additional GPG passphrase (still not what we want in first place)
- Thunderbird OpenPGP Smartcard tutorial – this is where I mainly got the information for this tutorial
- Thunderbird OpenPGP FAQ
- GPGit – An automated code signing tool


Hi, you might want to try the Octopus, which is based on Sequoia, instead of RNP. It uses gpg agent without any further configuration. https://gitlab.com/sequoia-pgp/sequoia-octopus-librnp#gpg-agent-integration
Yeah, I also saw this (it is linked in the continue reading section). I read, that there are still a few compatibility issues with Thunderbird (regarding packaging). I would love to see it integrated into Thunderbird by default. Did you try it out on Arch Linux on any other OS?
hi, sorry for if this is a dumb question but, you stated in the beginning:
“We will use the GnuPG keyring for email encryption and the builtin RNP library for decryption.”
Isnt that supposed to be the other way around? like:
“We will use the GnuPG keyring for email decryption and the builtin RNP library for encryption.”
Because for private key operations it means you will be decrypting, hence you will use the GnuPG keyring from the system.
Very good catch! I’ve corrected it 🙂